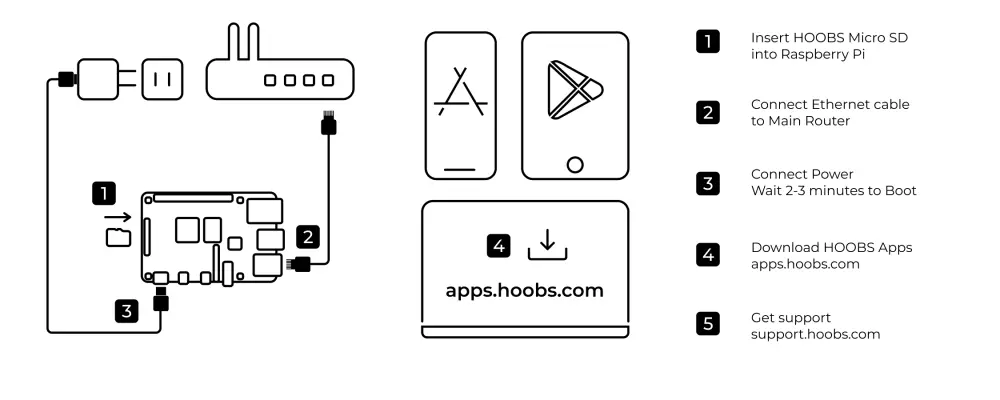
Setting Up HOOBS Image in 10 Steps:
To flash the HOOBS image onto your MicroSD card using the Raspberry Pi Imager tool, follow these steps:
1. Download the Raspberry Pi Imager
• Visit the official Raspberry Pi website and download the Raspberry Pi Imager for your operating system (Windows, macOS, or Linux).
2. Install the Raspberry Pi Imager:
• Follow the installation instructions for your operating system.
3. Prepare the MicroSD Card
• Insert your MicroSD card (8GB minimum) into your computer using an SD card reader.
4. Launch Raspberry Pi Imager
• Open the Raspberry Pi Imager tool after installation.
5. Select the HOOBS Image
• In the Raspberry Pi Imager, click “CHOOSE OS”.
• Select “Use Custom” and browse to locate the HOOBS image file you’ve downloaded.
6. Choose the MicroSD Card
• Click “CHOOSE STORAGE” and select the MicroSD card you inserted into your computer.
7. Flash the Image
• Click “WRITE” to start flashing the HOOBS image onto the MicroSD card. This may take several minutes.
• Once the process is complete, the Raspberry Pi Imager will show a success message.
8. Insert the MicroSD Card
• After flashing is complete, safely eject the MicroSD card from your computer and insert it into your Raspberry Pi.
Your Raspberry Pi is now ready to run HOOBS, and you can proceed with the setup of your smart home devices.
9. Download the HOOBS App
• Download the HOOBS Apps
10. Access the Interface
• Once connected, you can access the interface via the HOOBS Apps.

Still need Help?
Check out our Knowledgebase for additional assistance.
Didn’t find the answer in the Knowledgebase? Contact our Customer Service.
